Onboarding of Customers
Step 1: Registration and Initial Setup
- Visit the registration page
- Complete the Registration Form: Fill out the form with the necessary details, such as your name, contact information, and business specifics.
- Submit the Form: Review your details for accuracy and submit the form to complete your registration.
Navigator Access
- Welcome Email: Check your email for a message from Wariyum Technology, which will include the URL for the Navigator(If you haven't received the email within a reasonable time frame, check your spam folder).
- Navigator Sign Up: Follow the URL to sign up for the Navigator using the registered email.
Step 2: Deploying Your Storefront
Upon logging into the Navigator, you will be greeted with the ‘Go-Live Checklist’ designed to guide you through the process of deploying your online store.
To ensure your storefront accurately represents your business, we require the following informations:
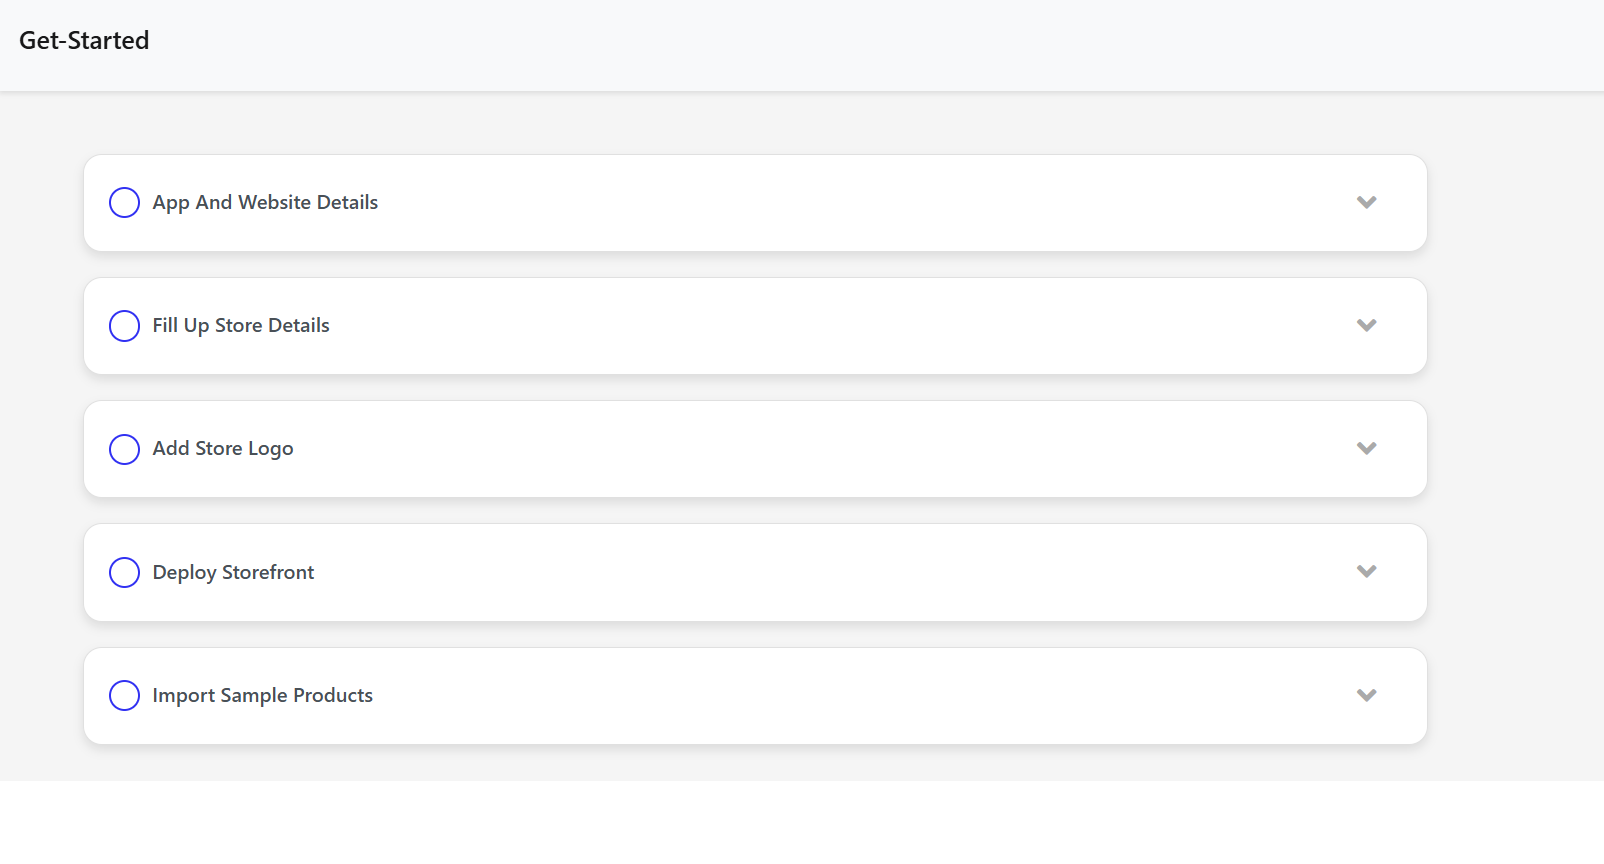
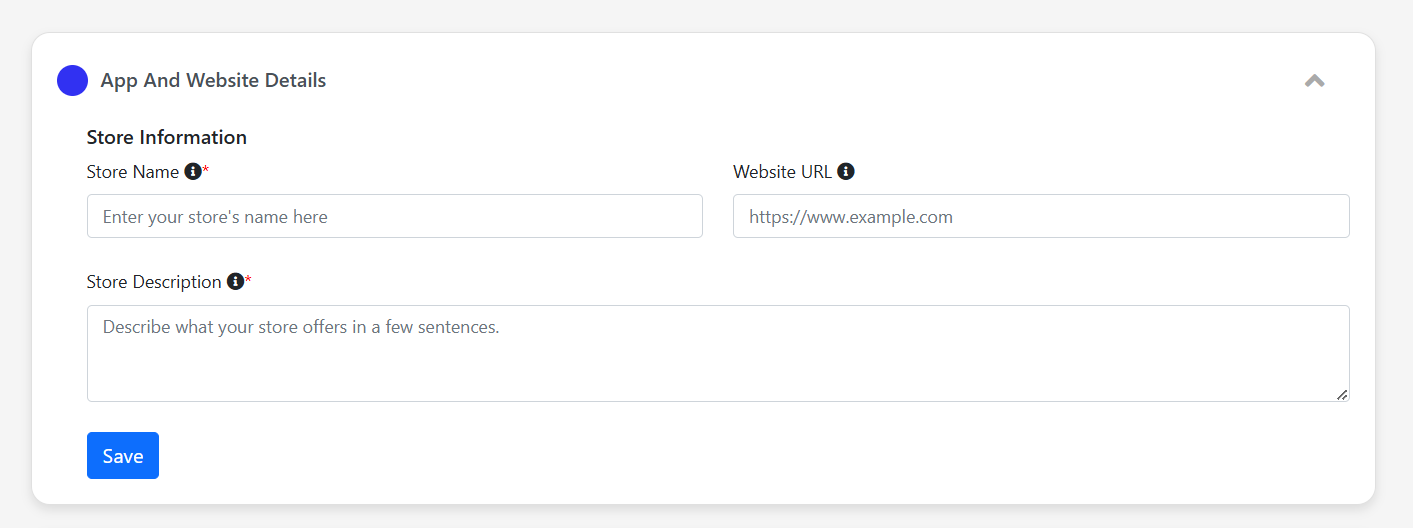
- App and website details:To successfully configure your online store, we require the following details:
- Store Name: The name you want displayed on your app and website.
- Website URL: Your store's website address (e.g., https://yourstore.com).
- Store Description: A brief description of your store, including products or services offered and any key details that highlight your brand.
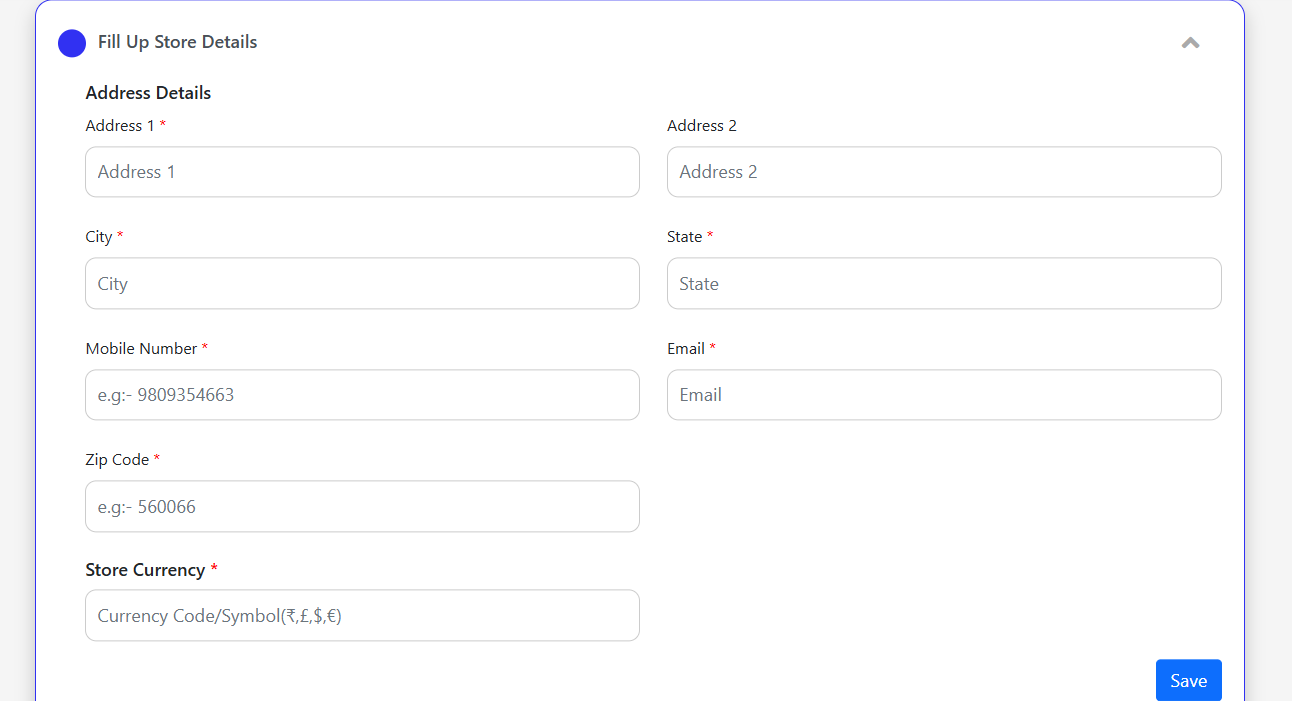
 2. Fill up Store Details: Here you will provide foundational details about your store. This includes your business’s physical address, as well as the primary currency for your transactions, ensuring accurate pricing and checkout experiences for your customers.
 3. Add Store Logo: Your store's logo is a cornerstone of your brand identity. Upload a high-resolution logo that will be prominently displayed across your store. This enhances brand recall and lends a professional appearance to your storefront.
| Description | Type |
|---|---|
| Required Formats | .jpg or .png |
| Logo Dimensions | 1024 x 230px |
| Icon Dimensions | 1000 x 1000px |
| Preferred Background | Transparent or White |

- Deploy Storefront: This step will launch your store. Once all the previous steps are completed and your content is reviewed, your store will be ready to go live.
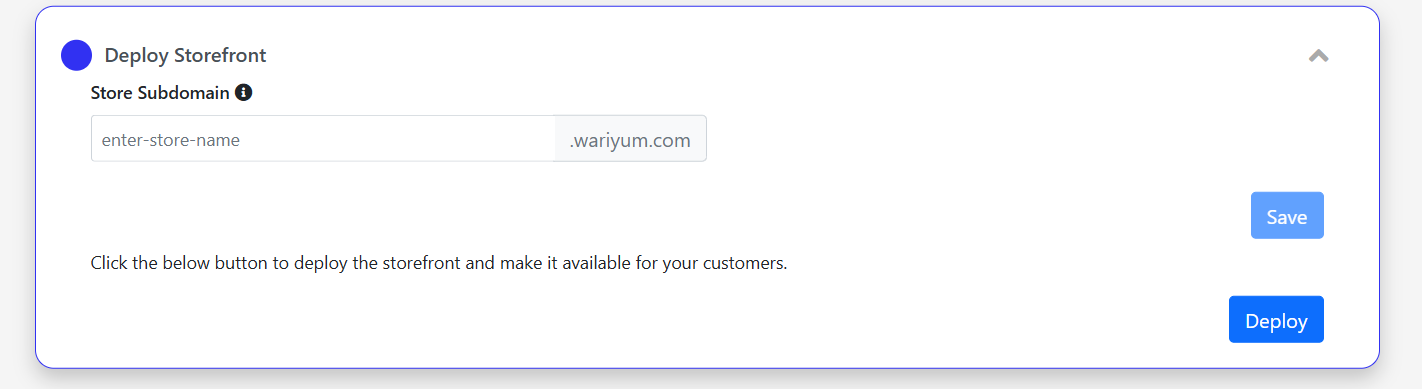
During the deployment, you will be prompted to choose a subdomain name for your store. This subdomain will create a unique URL for your store in the format: (storename).wariyum.com.
Subdomain Name: Choose a custom name for your store, such as your business name, a catchy identifier, or any other relevant term (e.g., store123.wariyum.com).
Purpose: The subdomain serves as your store's distinct web address, making it easy for customers to visit and browse your products. For example, if your subdomain is fashionstore.wariyum.com, customers can simply go to that URL to explore your offerings.
Note: The subdomain is temporary and will remain active only until your free trial period ends.
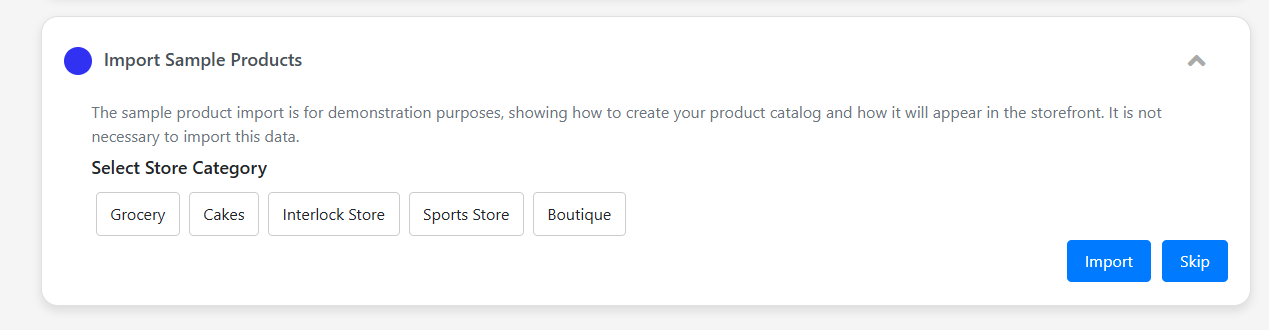
- Import Sample Products: This option allows you to quickly populate your store with sample products. This step is crucial for visualizing how your actual products will look and for conducting initial testing of the storefront.
Once the checklist is complete and all items are marked with a check, You can then press the ‘Deploy Storefront’ button to launch your online presence.
Step 3: Post-Deployment and Support
After Going Live
-
Customize Your Store: Dive into the wealth of customization options to further refine the look and feel of your store.
-
Add Your Products: Replace the sample products with your own inventory, using the samples as a guide for descriptions, images, and pricing.
-
Add Categories, Brands and Banners:
Categories: Group products for easy navigation (e.g., "Men's Apparel," "Electronics").
Brands: Display product brands to allow brand-based filtering and enhance recognition.
Banners: Highlight promotions, sales, or new arrivals to attract customer attention and drive engagement.
Ongoing Support
If at any point you need assistance or have questions, our dedicated support team is here to help you succeed. Contact us via business@wariyum.com
Step 4: Service Request
If you need any further support from wariyum please raise a Service Request.