Stripe
Service Request ID: TP-INTG-PG-S

Overview
Nearme has integrated with Stripe. Stripe is a payment processing platform that helps merchants of an online store accept payments from customers.Stripe supports a wide range of payment methods, including credit and debit cards, digital wallets like Apple Pay and Google Pay, and local payment methods such as Alipay and WeChat Pay. This allows merchants to accept payments from customers all over the world and provides a more seamless payment experience for customers.
Merchant onboarding with Stripe
When you onboard with Stripe, you gain access to a suite of powerful tools and features for accepting payments, managing subscriptions, and preventing fraud. Here’s an overview of the merchant onboarding process with Stripe:
-
Sign up for a Stripe account: Begin by signing up for a new Stripe account. You’ll need to provide your email address, create a password, and complete a brief questionnaire about your business.
-
Provide business details: After signing up, you’ll need to enter your business information, including the legal name, address, tax identification number, and the type of products and services you offer.
-
Verify your identity: Like other Payment Service Providers, Stripe requires new businesses to verify their identity as part of the KYC process. You may be asked to provide personal identification documents, such as a government-issued ID, passport, or driver’s license.
-
Connect your bank account: To receive payouts from Stripe, you’ll need to provide your bank account information, including the account number and routing number. Stripe supports payouts in more than 135 currencies and works with bank accounts from numerous countries.
-
Obtain API keys: Once you have created a Stripe account, you will need to obtain API keys. These are unique identifiers that will allow your website to interact with Stripe's servers. You can find your API keys in the Stripe Dashboard.
-
Share API Keys:
- Securely store the API key and secret.
- You can share these keys with the NearMe integration team to configure Razorpay for your store.
-
Integration Setup:
- The Wariyum support team will use the provided API keys to integrate Razorpay with your NearMe store.
-
Confirmation:
- Once the integration is complete, you will receive a notification confirming that Razorpay is active on your store.
Storefront
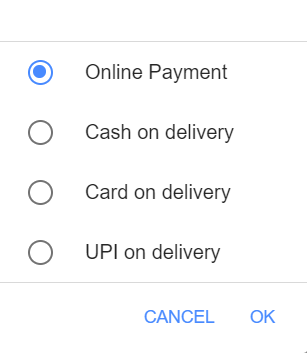
Select "online payment" as payment option

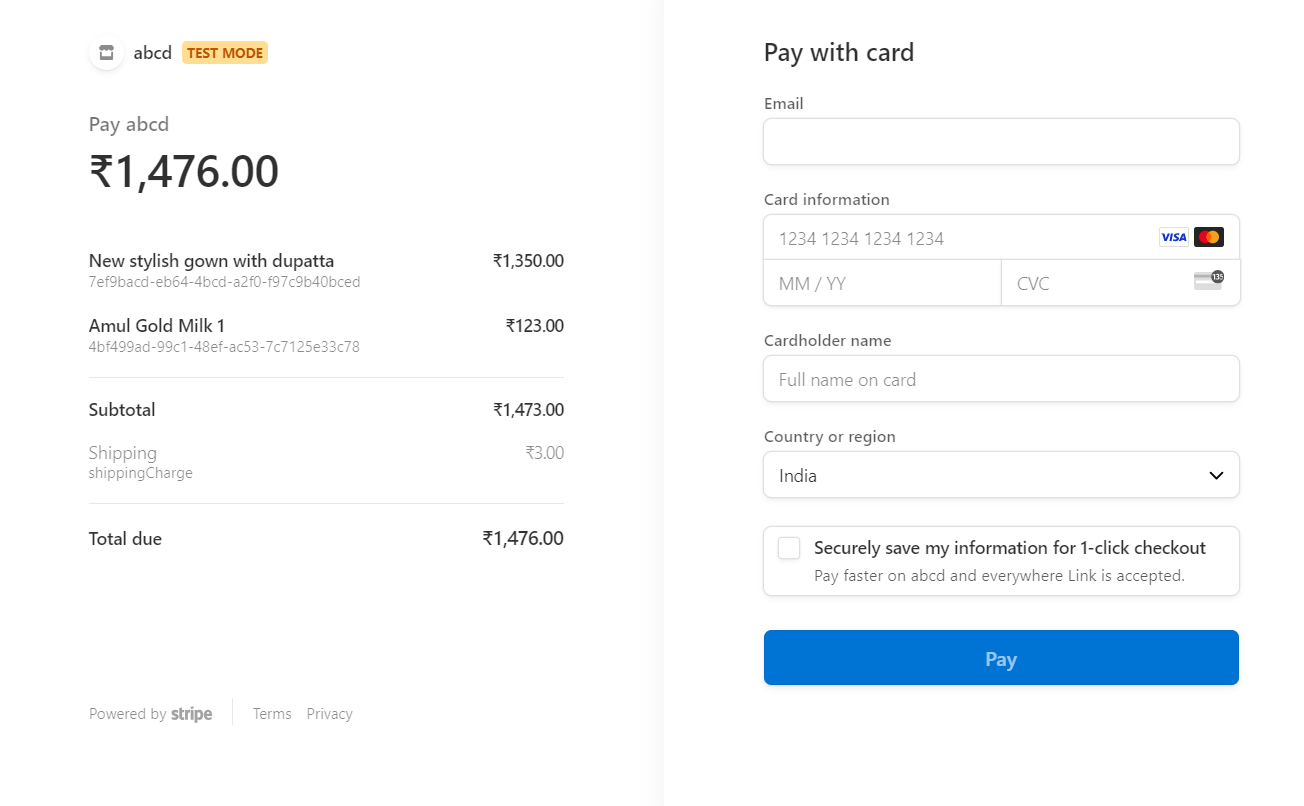
Once you click the "Pay now" button, you'll be directed to the secure Stripe payment page where you can proceed with your payment. Here, you'll find a seamless interface for completing your transaction with ease and confidence.
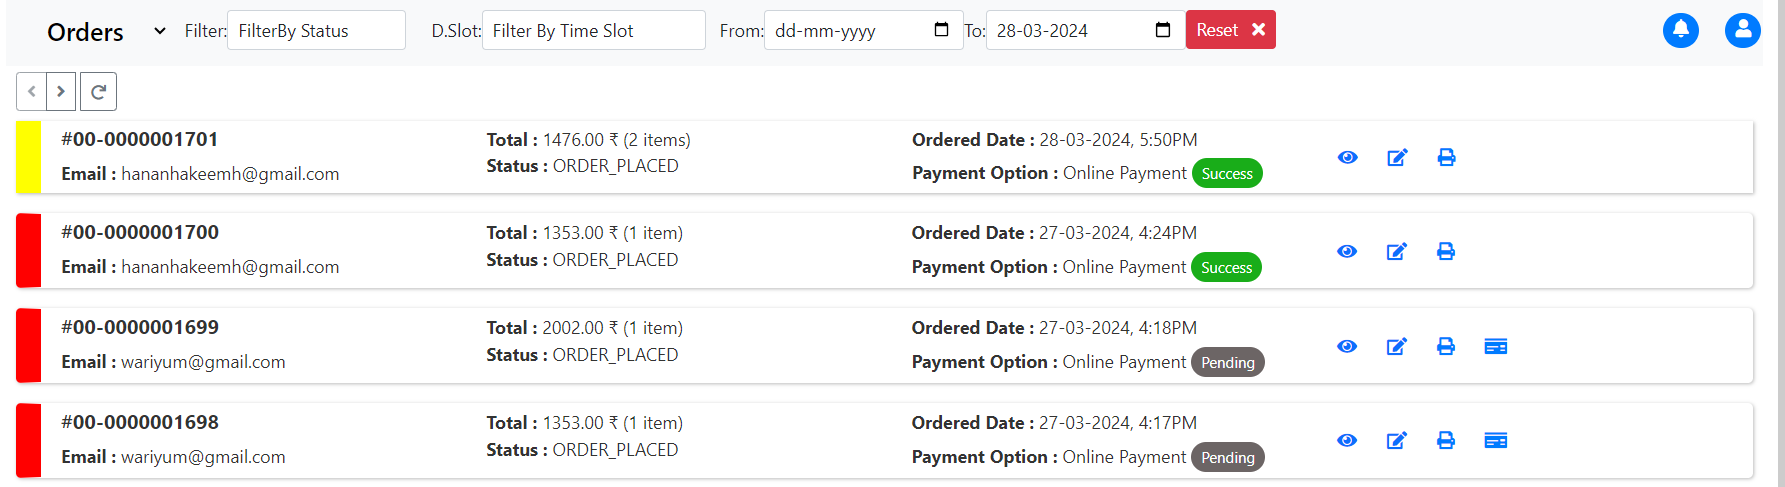
Navigator
On the orders page, you can easily monitor the progress of customer's transaction and stay informed about its current status. Whether it's pending, sucess, or failed, you'll have visibility into the payment's journey.